- Create a live stream
- View live stream detail information
- View live stream input health
- Live event notification settings
- Recording configuration
- View live metrics
- View live usage
- View live API logs
This topic shows you how to perform live stream related operations in the AuroraLive console.
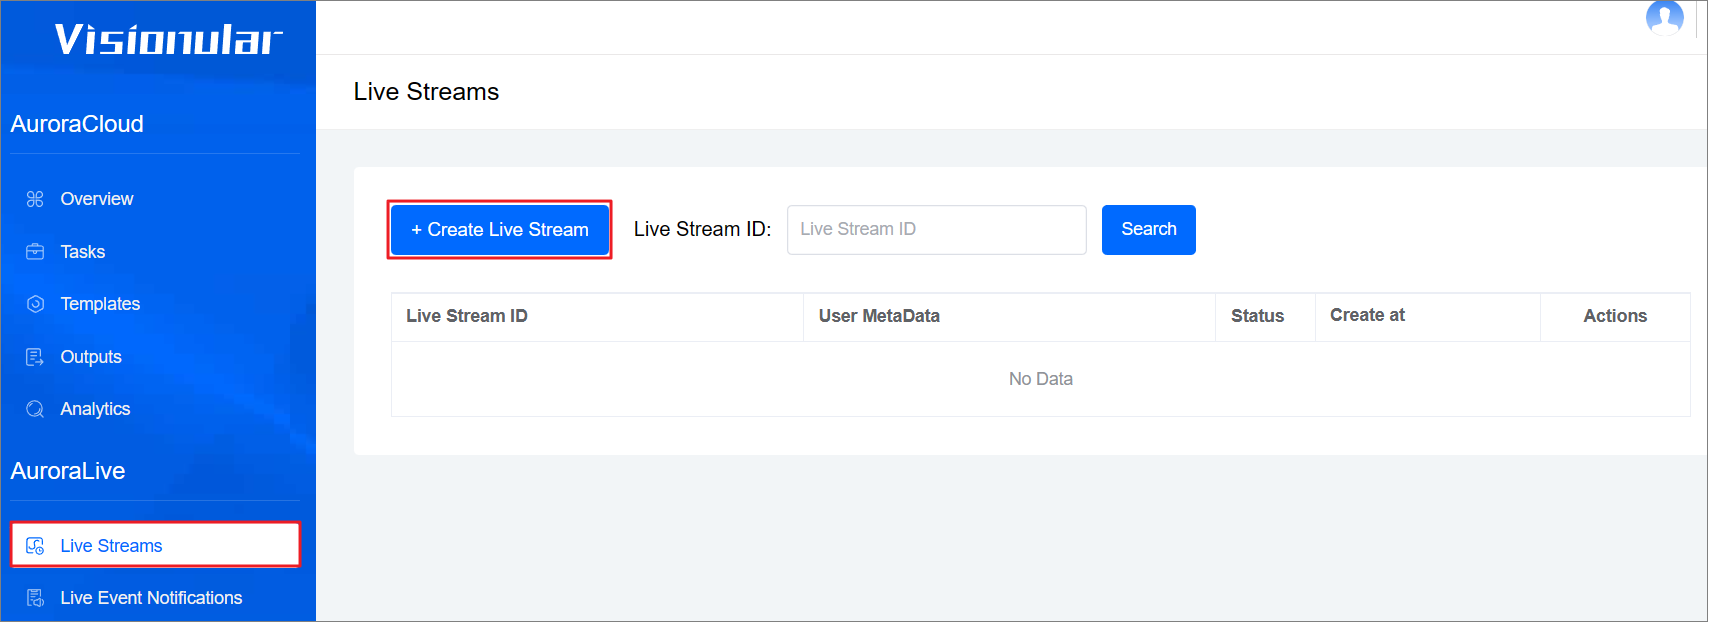
Create a live stream
Log in to the AuroraLive console.
In the left navigation pane, choose Live Streams.
Click + Create Live Stream.
Set parameters, and click Run request.
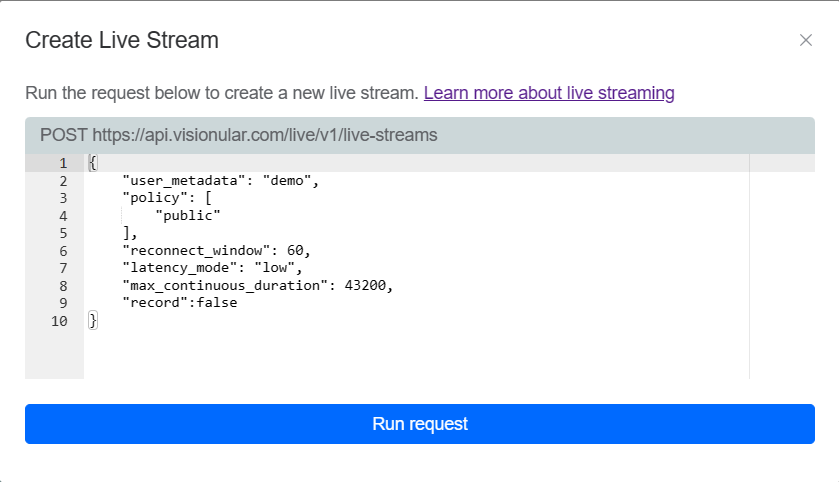
More detailed parameter introduction can refer to this Create a live stream
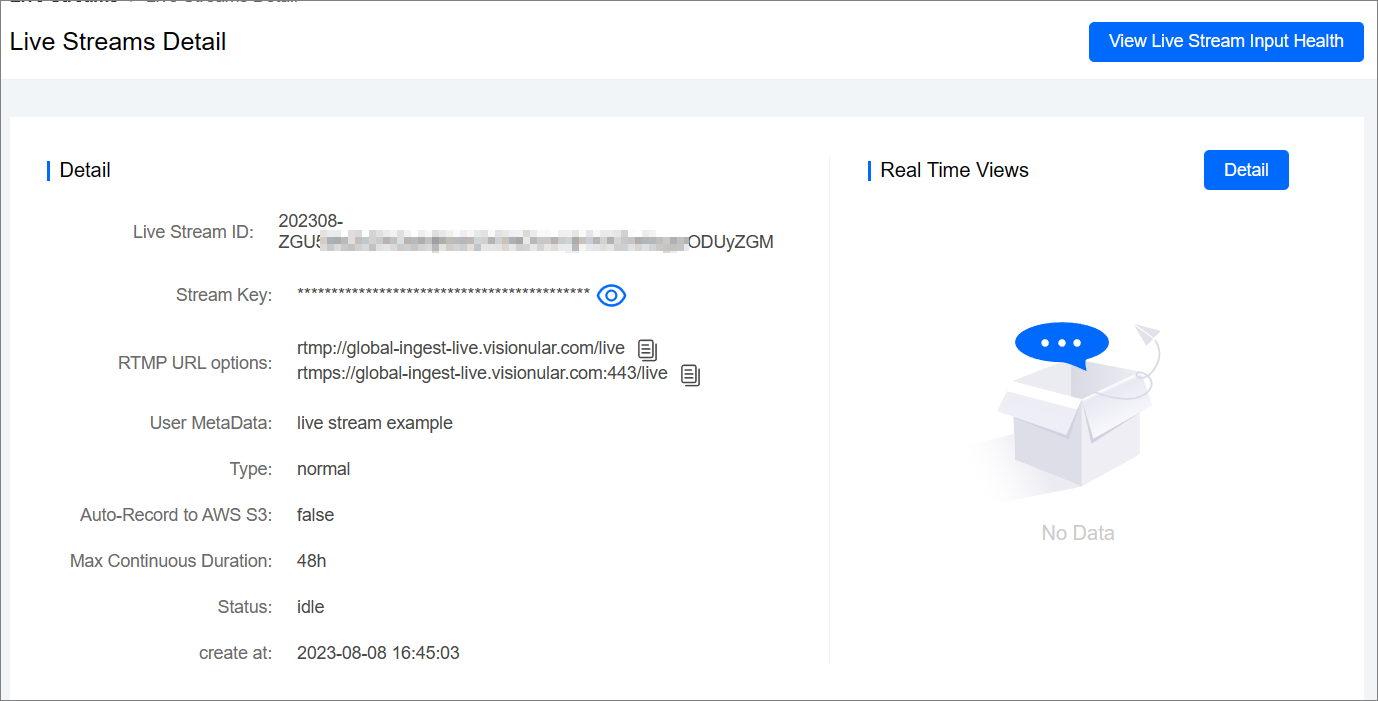
View live stream detail information
Log in to the AuroraLive console.
In the left navigation pane, choose Live Streams.
Find the desired stream in the live streams list and click detail.
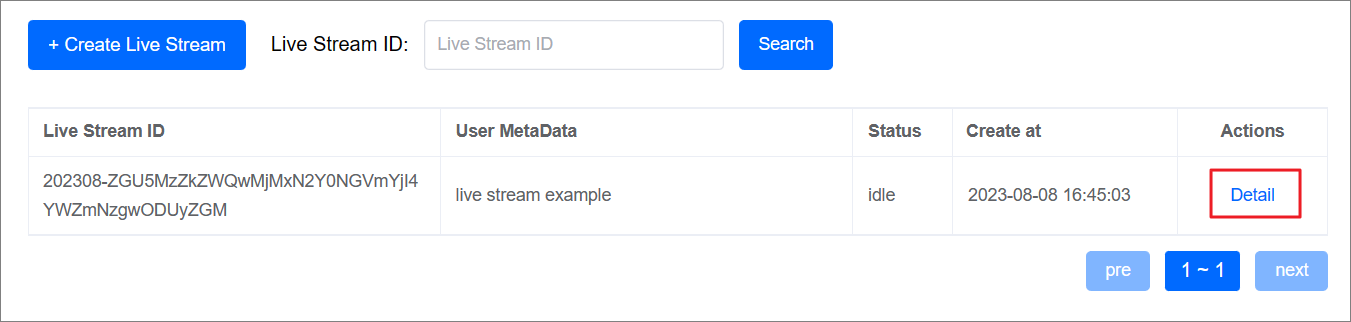
View live stream detail information in the displayed Live Stream Detail page.
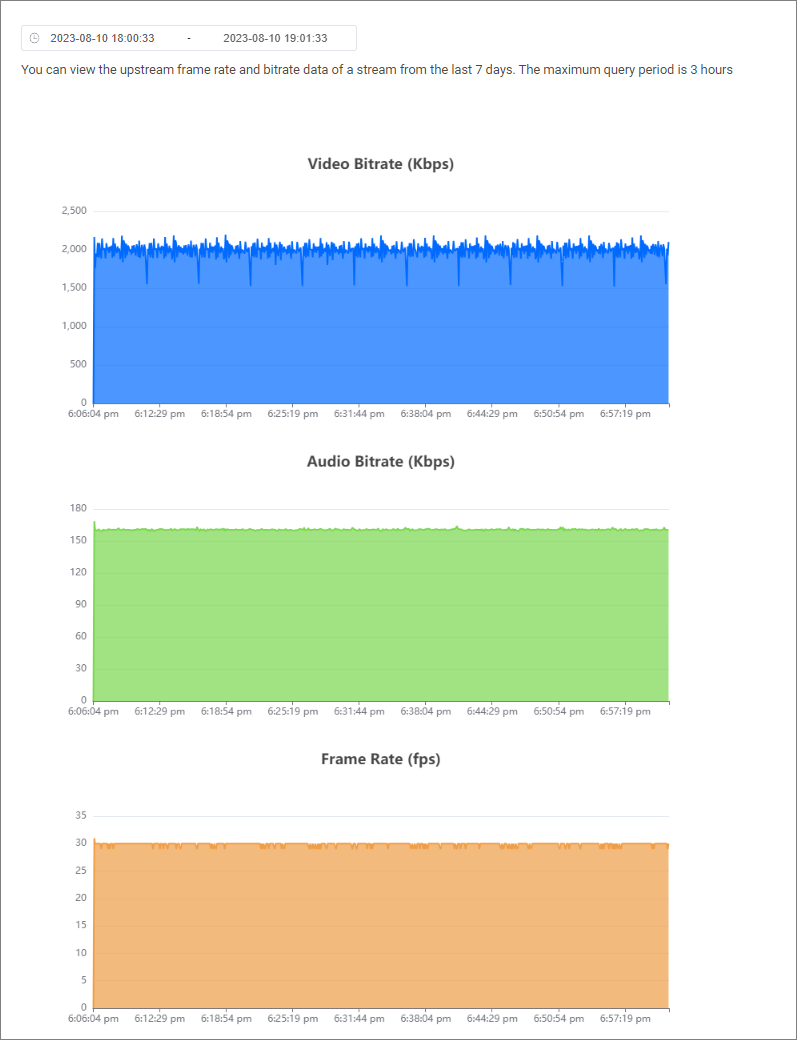
View live stream input health
The Live Stream Input Health dashboard is a real-time dashboard that provides visibility on how AuroraLive receives your live stream from the encoder.
Log in to the AuroraLive console.
In the left navigation pane, choose Live Streams.
Find the desired stream in the live streams list and click detail.
In the displayed Live Stream Detail page, click View Live Stream Input Health.
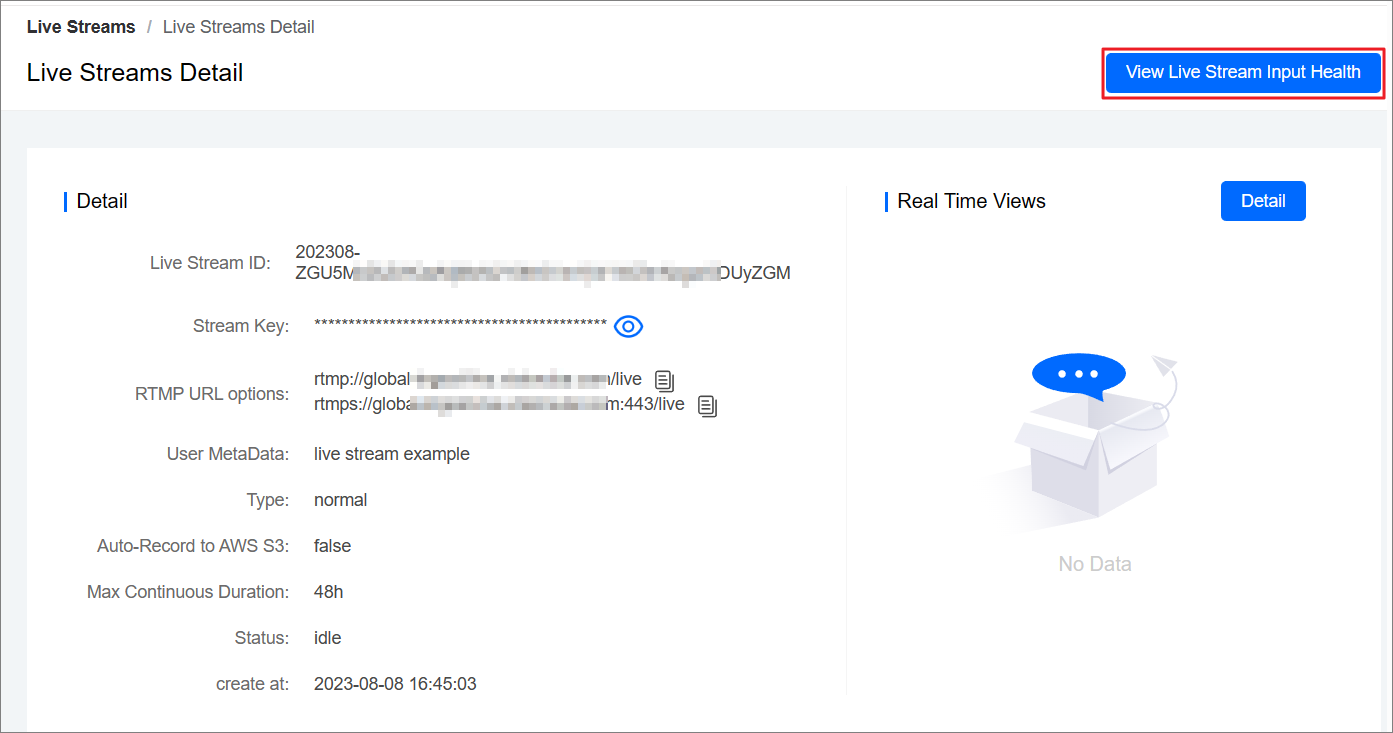
You can view the real-time live stream data.
Live event notification settings
AuroraLive supports event notifications which let your application know when things happen asynchronously, outside of an API request cycle.
For example, you may want to update something on your end when a live stream starts or is interrupted. When these asynchronous events happen, we'll make a POST request to the address you give us and you can do whatever you need with it on your end.
Log in to the AuroraLive console.
In the left navigation pane, choose Live Event Notifications.
Set live event notification parameters.
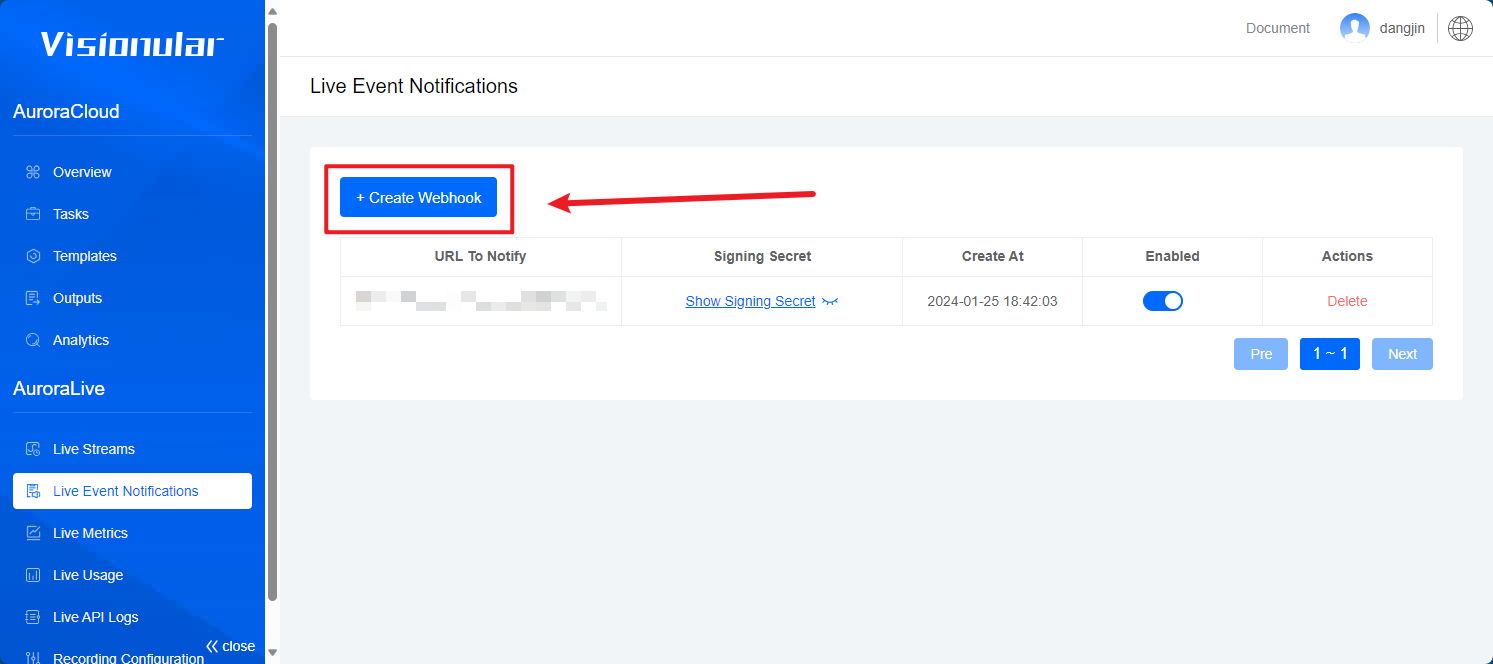
For more information of event notify, see Live Event Notifications.
Recording configuration
Before you can set up a stream for recording, you must create a recording-configuration. This is a resource which specifies an Amazon S3 location where the recorded streams for your account are stored. The S3 location must be in the US East (N. Virginia) us-east-1 region.
Log in to the AuroraLive console.
In the left navigation pane, choose Recording Configuration.
Configure recording parameters, and click Upadate.
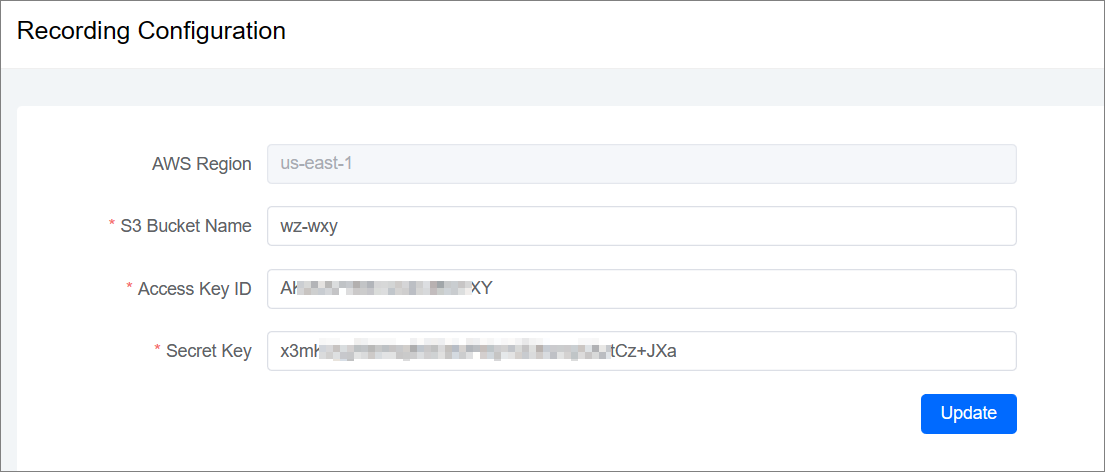
Parameters Description Required AWS Region The region of your account. The parameter is unconfigurable. unconfigurable S3 Bucket Name The name of your own S3 bucket.
Note: Your account and S3 location must be in the same region.Yes Access Key ID AccessKey ID of your S3 bucket. Yes Secret Key SerectKey of your S3 bucket. Yes
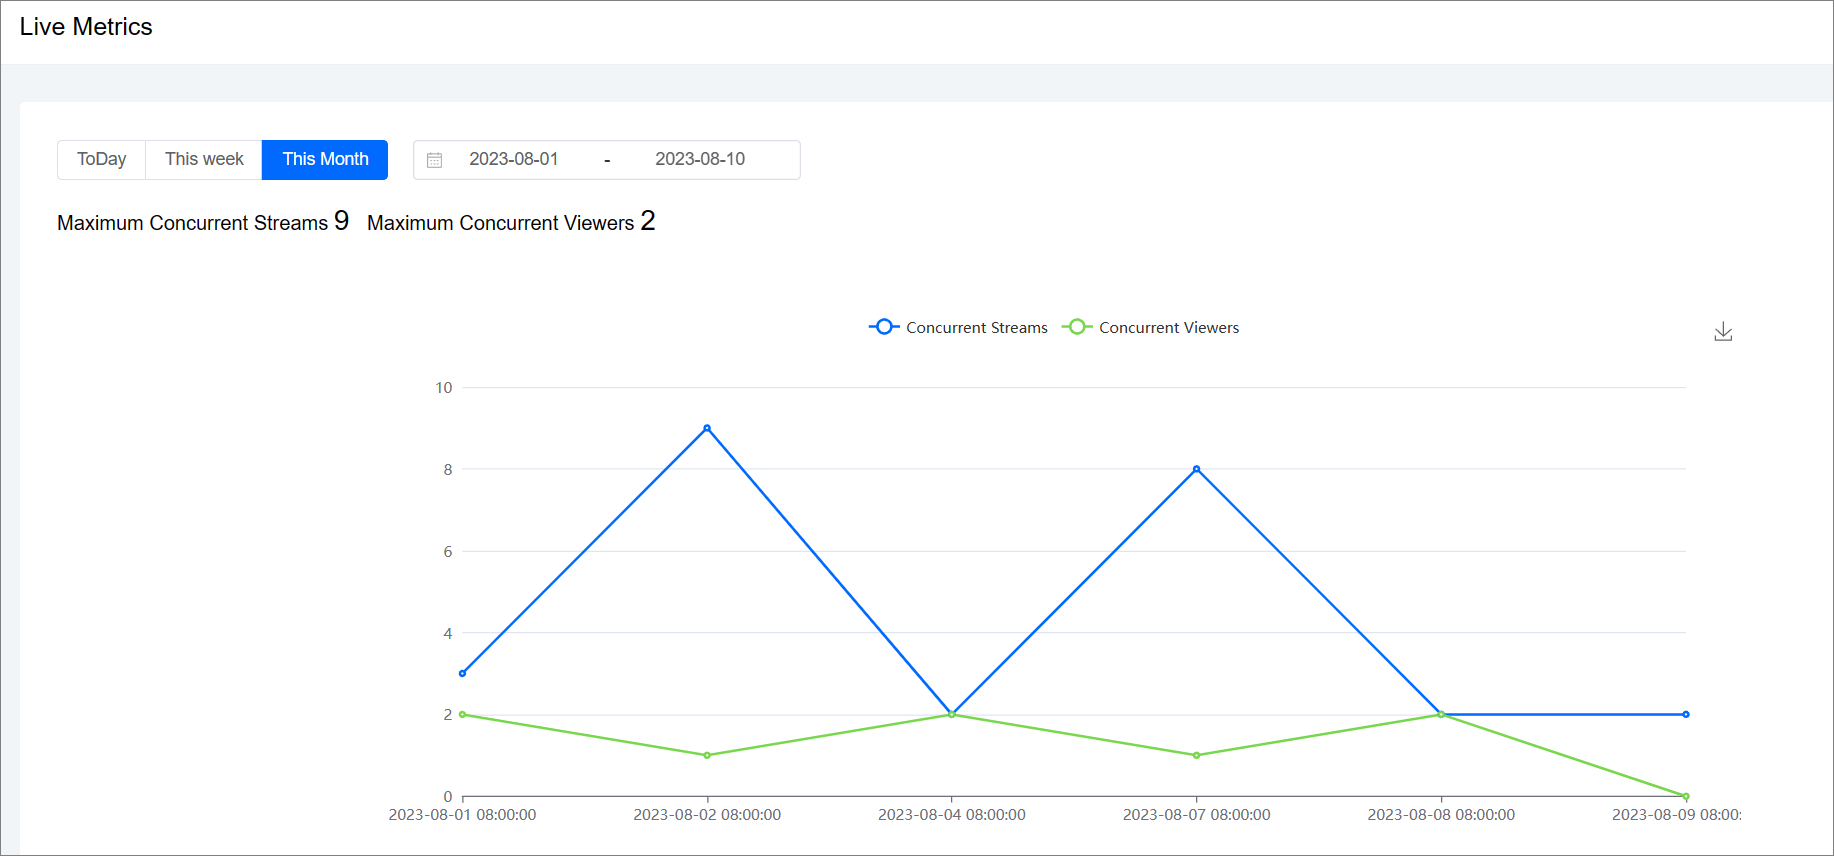
View live metrics
AuroraLive supports view your live metrics including concurrent streams and concurrent viewers.
Log in to the AuroraLive console.
In the left navigation pane, choose Live Metrics.
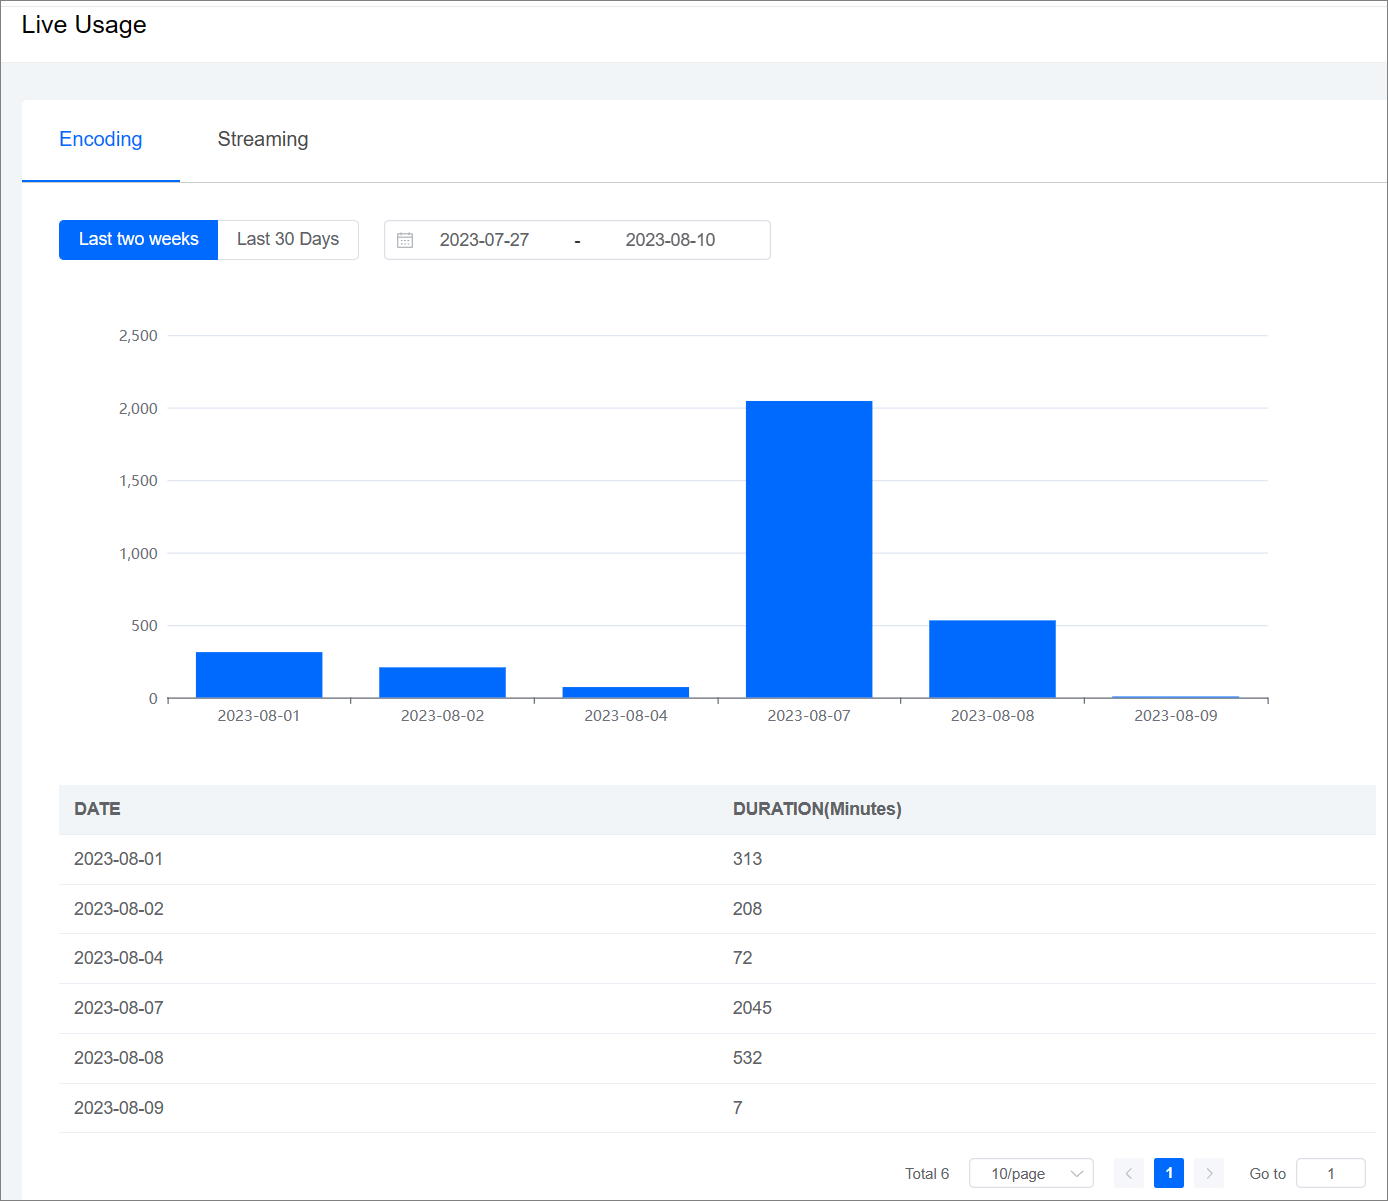
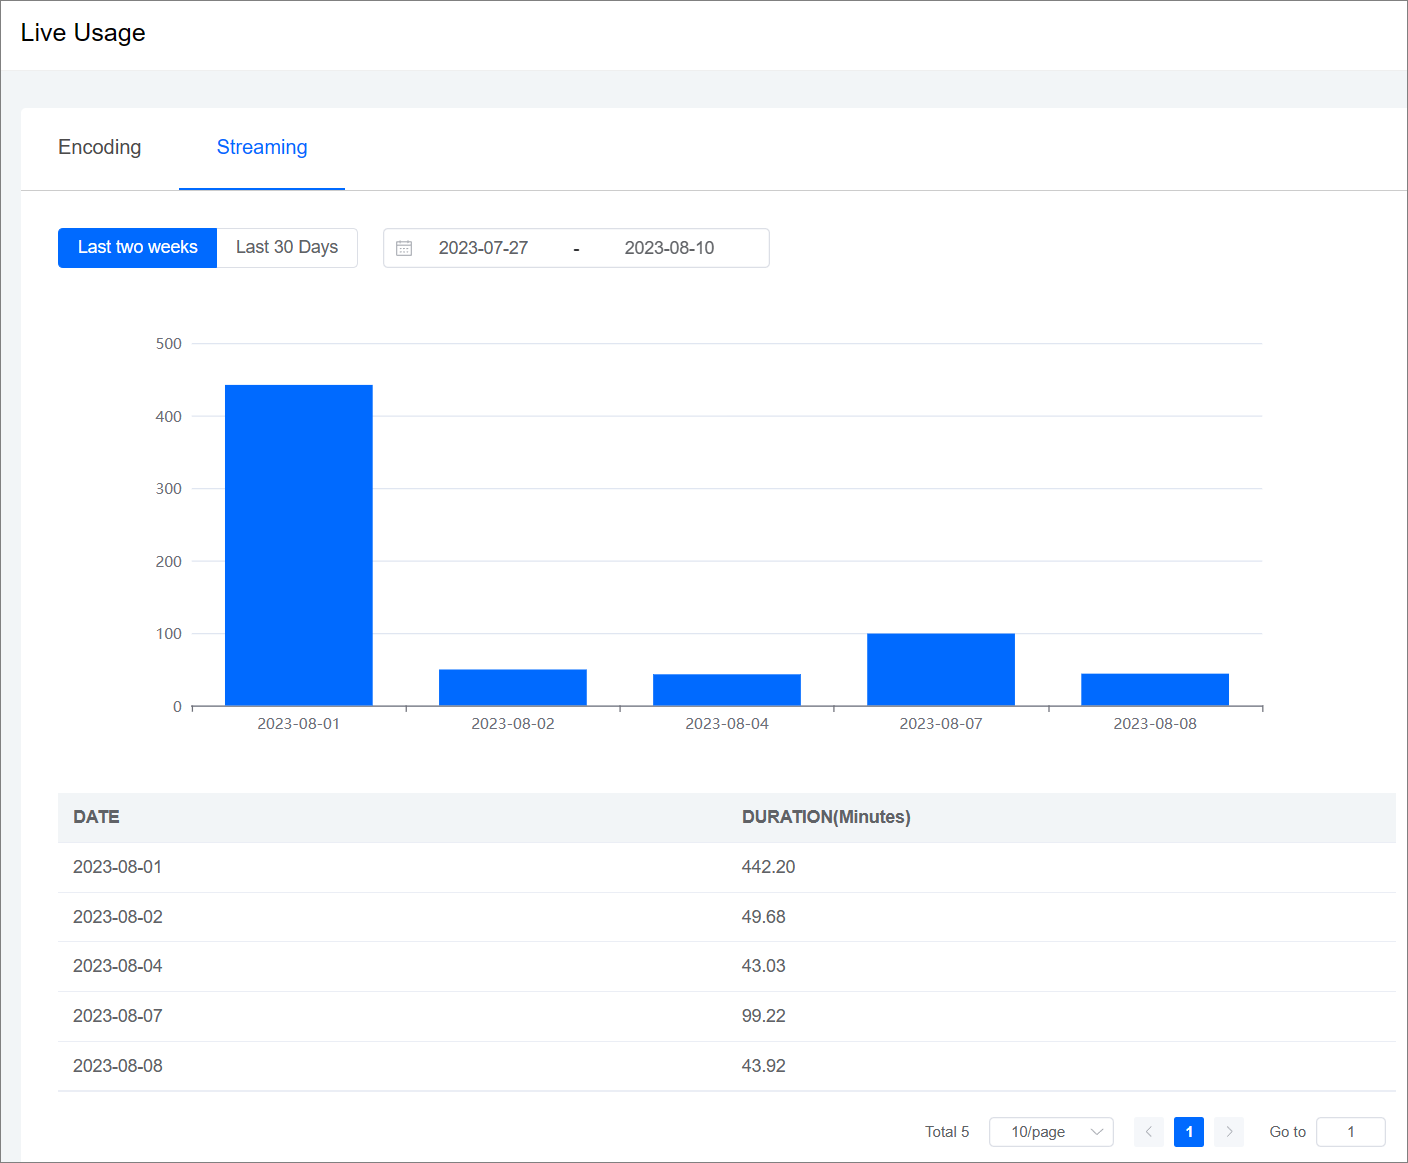
View live usage
AuroraLive provide live usage data of encoding and streaming.
Log in to the AuroraLive console.
In the left navigation pane, choose Live Usage.
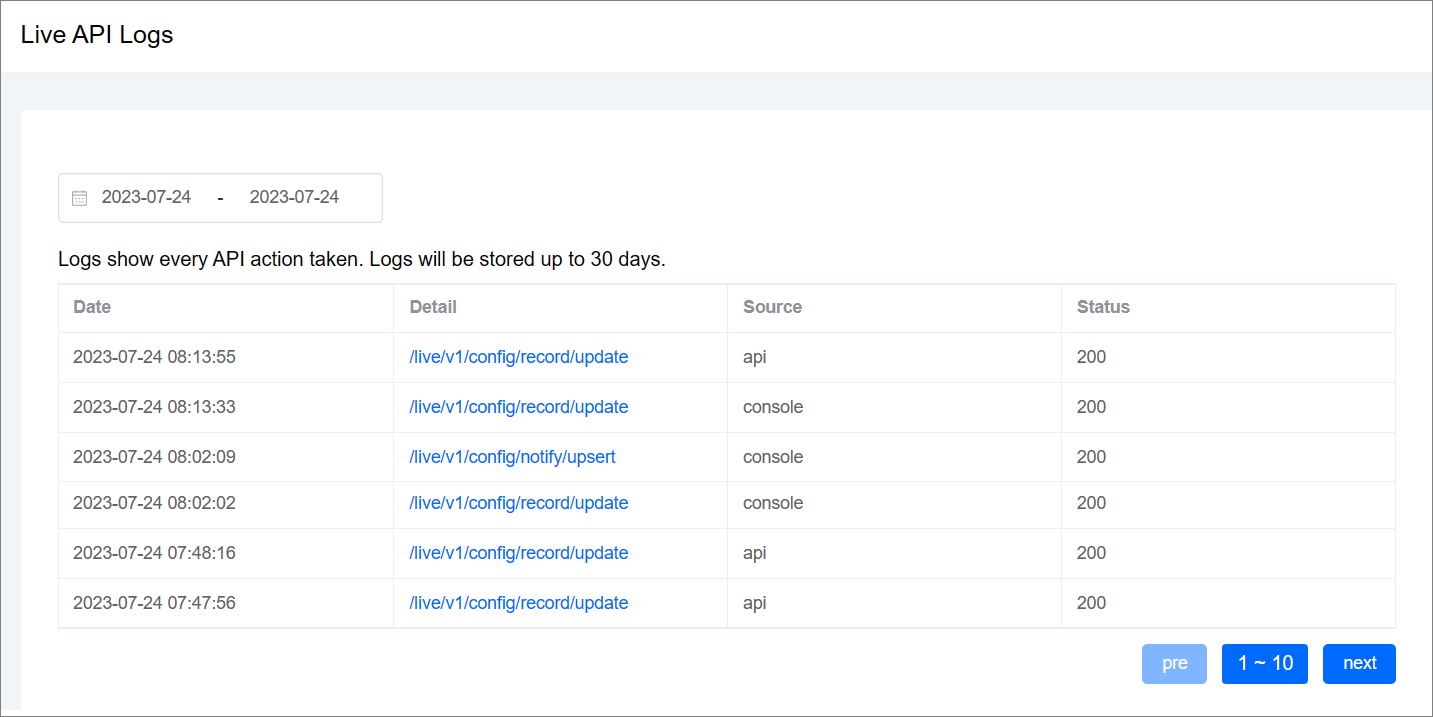
View live API logs
AuroraLive will record API logs when API actions are taken. After you take API actions, there is a delay (up to 15mins) before your logs can be viewed in the console. Logs will be stored up to 30 days.
The feature can help you do troubleshooting, when the API runs with error.
Log in to the AuroraLive console.
In the left navigation pane, choose Live API Logs.